
Loading and displaying images from the internet with Retrofit into your android app


In this tutorial, we'll learn how to load and display photos from a web URL. We'll use Glide to display a single image from a web service. Let's get started...
Step 1: Create a new project and call it DisplayDataImage
- Open Android Studio if it is not already opened.
- In the main Welcome to Android Studio dialog, click Start a new Android Studio project.
- The Choose your project dialog appears. Select Empty Activity as shown below, and click Next.
- In the Configure your project dialog, enter "DisplayDataImage" for the Name, set Minimum SDK to API 21 and click Finish
Step 2: Add various dependencies:
- Inside the dependencies block, add the Gradle dependency for the Retrofit, Moshi library, Glide library and ViewModel.
//Retrofit
implementation "com.squareup.retrofit2:retrofit:2.9.0"
implementation "com.squareup.retrofit2:converter-moshi:2.9.0"

//Moshi Library
implementation "com.squareup.moshi:moshi-kotlin:1.9.3"

//Glide Library
implementation "com.github.bumptech.glide:glide:4.8.0"

//ViewModel
implementation "androidx.lifecycle:lifecycle-viewmodel-ktx:2.2.0"
- Add the data binding dependency to Gradle
android{...

    buildFeatures {
        dataBinding true
    }
- Apply the kotlin-kapt plugin at the top of the build.gradle file
id 'kotlin-kapt'
- Ensure the support for Java 8 language features are added
compileOptions {
    sourceCompatibility JavaVersion.VERSION_1_8
    targetCompatibility JavaVersion.VERSION_1_8
}
kotlinOptions {
    jvmTarget = '1.8'
}
Click on Sync Now
Step 3: Implement the DataProperty
- Create a data class, call it DataProperty and add the following code
data class DataProperty(
        val id: String,
        val name: String,
        val propellant: String,
        val destination: String,
        @Json(name = "imageurl") val imgSrcUrl: String,
        val technologyexists: String
)
Each of the variables in the DataProperty data class corresponds to a key name in the JSON object.
Step 4: Setup ViewModel and connect with DisplayDataFragment
- Create a new Kotlin class called DisplayDataViewModel class and make the class extend the abstract class ViewModel
class DisplayDataViewModel : ViewModel() {
}
- In DisplayDataViewModel, we create both internal and external LiveData for the status String
private val _status = MutableLiveData<String>()

val status: LiveData<String>
    get() = _status
- Add an encapsulated
LiveData<DataProperty>property:
private val _property = MutableLiveData<DataProperty>()

val property: LiveData<DataProperty>
  get() = _property
Add a Fragment class and create a binding object
- Select File > New > Fragment > Fragment (Blank).
- For the Fragment Name, enter DisplayDataFragment.
- For the Fragment layout name, enter fragment_display_data
- For source language, select Kotlin and click Finish.
- Open the DisplayDataFragment.kt fragment file, if it is not already open.
- Delete the onCreate() method, the fragment initialization parameters, companion object and the code inside onCreateView().
- Next, create a binding object and inflate the Fragment's view (which is equivalent to using setContentView() for an Activity). Make sure your DisplayDataFragment class looks like the following:
class DisplayDataFragment : Fragment() {
    override fun onCreateView(
        inflater: LayoutInflater, container: ViewGroup?,
        savedInstanceState: Bundle?
    ): View? {
        val binding = FragmentDisplayDataBinding.inflate(inflater)
        return binding.root
    }
}
Add the new fragment to the main layout file
- Open res > layout > activity_main.xml and select the Code tab to view the layout XML code.
- Delete the codes Inside the existing main layout file.
- Add the following code:
<?xml version="1.0" encoding="utf-8"?>
<fragment xmlns:android="http://schemas.android.com/apk/res/android"
    android:id="@+id/displayDataFragment"
    android:name="com.example.displaydataimage.DisplayDataFragment"
    android:layout_width="match_parent"
    android:layout_height="match_parent" />
- At the top of DisplayDataFragment class, make the DisplayDataFragment lazily initializes the DisplayDataViewModel.
private val viewModel: DisplayDataViewModel by lazy {
    ViewModelProvider(this).get(DisplayDataViewModel::class.java)
}
- Inside the fragment_display_data.xml layout, wrap your root layout inside tags. This adds the data binding for the view model. Import the DisplayDataViewModel. The fragment_display_data.xml should look like this:
<layout ...>
    <data>
        <variable
            name="viewModel"
            type="com.example.displaydataimage.DisplayDataViewModel" />
    </data>
</layout>
- In the fragment_display_data, inside the root layout create the ImageView, and add an app:imageUrl attribute to the ImageView element to use the new image loading binding adapter:
    <ImageView
        android:id="@+id/mars_image"
        android:layout_width="match_parent"
        android:layout_height="170dp"
        android:adjustViewBounds="true"
        android:padding="2dp"
        app:imageUrl="@{viewModel.property.imgSrcUrl}"
        android:scaleType="centerCrop"
        tools:src="@tools:sample/backgrounds/scenic" />
- Inside the DisplayDataFragment file, import the
com.example.displaydataimage.databinding.FragmentDisplayDataBindingand Specify the DisplayDataFragment view as the lifecycle owner of the binding then passes the viewModel into the data binding.
binding.lifecycleOwner = this
binding.viewModel = viewModel

return binding.root
Step 5: Implement the DisplayDataApiService
Create DisplayDataApiService.kt file and add a constant Base Url at the top of the file. We will use a fake Online REST API.
private const val BASE_URL = "https://raw.githubusercontent.com/"Below the constant, add the following code to create the Moshi instance.
  private val moshi = Moshi.Builder()
   .add(KotlinJsonAdapterFactory())
   .build()
Below the Moshi instance, use a Retrofit builder to create a Retrofit object.
private val retrofit = Retrofit.Builder()
   .addConverterFactory(MoshiConverterFactory.create(moshi))
   .baseUrl(BASE_URL)
   .build()
- Just below the call to the Retrofit builder, define an interface that defines how Retrofit talks to the web server using HTTP requests.
interface DisplayDataApiService {
    @GET("Oclemy/SampleJSON/338d9585/spacecrafts.json")
    suspend fun getProperties():
            List<DataProperty>
}
- Below the DisplayDataApiService interface, define a public object called DataApi to initialize the Retrofit service.
object DataApi {
    val retrofitService : DisplayDataApiService by lazy {
       retrofit.create(DisplayDataApiService::class.java) }
}
Step 6: Call the web service in DisplayDataViewModel.
- In the DisplayDataViewModel, at the bottom of the class we create the init block and call getDetails() method inside.
- Create the getDetails method
- Inside getDetails(), launch the coroutine using viewModelScope.
- Inside the launch block, add a try/catch block to handle exceptions:
- Inside the try {} block, call getProperties() on the retrofitService object. Calling getProperties() from the DataApi service creates and starts the network call on a background thread.
- Also inside the try {} block, update getMarsRealEstateProperties() to set _property to the first MarsProperty from listResult.
- Inside the catch {} block, handle the error response to a status value.
Your code should look like this:
init {
        getDetails()
    }

    private fun getDetails() {
        viewModelScope.launch {
            try {
                val listResult = DataApi.retrofitService.getProperties()
                if (listResult.size > 0) {
                    _property.value = listResult[0]
                }
            } catch (e: Exception) {
                _status.value = "Failure: ${e.message}"
            }
        }
    }
Step 7: Create a binding adapter and call Glide.
In this step, you use a binding adapter to take the URL from an XML attribute associated with an ImageView, and you use Glide to load the image.
Create BindingAdapters.kt to hold the binding adapters.
- Create a bindImage() function that takes an ImageView and a String as parameters. Annotate the function with @BindingAdapter.
- Inside the bindImage() function, add a let {} block for the imgUrl argument
- Inside the let {} block, add the line shown below to convert the URL string (from the XML) to a Uri object.
- Still inside let {}, call Glide.with() to load the image from the Uri object into the ImageView.
- of course, add the loading_animation and the ic_broken_image into drawable folder.
@BindingAdapter("imageUrl")
fun bindImage(imgView: ImageView, imgUrl: String?) {
    imgUrl?.let {
        val imgUri =
           imgUrl.toUri().buildUpon().scheme("https").build()
        Glide.with(imgView.context)
                .load(imgUri)
                .into(imgView)
    }
}
Step 8: Define the internet permission.
<uses-permission android:name="android.permission.INTERNET" />
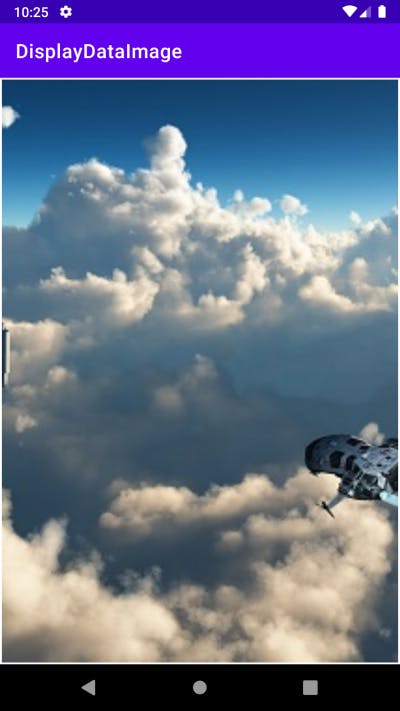
- Compile and run the app. If everything is working correctly with your internet connection, you see:
Cover Photo by Markus Winkler on Unsplash