
Retrieve and Display data from the internet into your Android App with Retrofit: 2


In the previous task, we retrieved data from a web API service JSONPlaceholder and displayed the raw JSON data into our android app. We'll go over the steps covered in the last task but this time we'll parse the JSON response with Moshi library and convert the network service and the ViewModel to use coroutines. Let's get started...
Step 1: Create a new project and call it DisplayData
- Open Android Studio if it is not already opened.
- In the main Welcome to Android Studio dialog, click Start a new Android Studio project.
- The Choose your project dialog appears. Select Empty Activity as shown below, and click Next.
- In the Configure your project dialog, enter "DisplayData" for the Name and click Finish
Step 2: Add various dependencies:
- Inside the dependencies block, add the Gradle dependency for the Retrofit, Moshi library and ViewModel.
//Retrofit
implementation "com.squareup.retrofit2:retrofit:2.9.0"
implementation "com.squareup.retrofit2:converter-moshi:2.9.0"

//Moshi Library
implementation "com.squareup.moshi:moshi-kotlin:1.8.0"
//ViewModel
implementation "androidx.lifecycle:lifecycle-viewmodel-ktx:2.2.0"
- Add the data binding dependency to Gradle
android{...

    buildFeatures {
        dataBinding true
    }
- Apply the kotlin-kapt plugin at the top of the build.gradle file
id 'kotlin-kapt'
- Ensure the support for Java 8 language features are added
compileOptions {
    sourceCompatibility JavaVersion.VERSION_1_8
    targetCompatibility JavaVersion.VERSION_1_8
}
kotlinOptions {
    jvmTarget = '1.8'
}
Click on Sync Now
Step 3: Setup ViewModel and connect with MainActivity
- Create a new Kotlin class called DisplayDataViewModel class and make the class extend the abstract class ViewModel
class OverviewViewModel : ViewModel() {
}
- In DisplayDataViewModel, we create both internal and external LiveData for the response String
private val _response = MutableLiveData<String>()

val response: LiveData<String>
    get() = _response
- At the top of MainActivity class, make the MainActivity lazily initializes the DisplayDataViewModel.
private val viewModel: DisplayDataViewModel by lazy {
    ViewModelProvider(this).get(DisplayDataViewModel::class.java)
}
- Inside the onCreateView() method. Inflate the MainActivity layout using data binding. Comment out or delete the setContentView line of code.
//setContentView(R.layout.activity_main)
val binding: ActivityMainBinding =
    DataBindingUtil.setContentView(this, R.layout.activity_main)
- In the activity_main.xml layout, add the data binding for the view model. This imports DisplayDataViewModel. (Make layout view the root view).
<layout ...>
    <data>
        <variable
            name="displayDataViewModel"
            type="com.example.marsproperty.DisplayDataViewModel" />
    </data>
</layout>
- Create the Constraintlayout, and add the TextView inside. Bind the response from the ViewModel to the TextView
<androidx.constraintlayout.widget.ConstraintLayout
        android:layout_width="match_parent"
        android:layout_height="match_parent"
        tools:context=".MainActivity">
    <TextView
        android:layout_width="wrap_content"
        android:layout_height="wrap_content"
        android:text="@{displayDataViewModel.response}"
        app:layout_constraintBottom_toBottomOf="parent"
        app:layout_constraintLeft_toLeftOf="parent"
        app:layout_constraintRight_toRightOf="parent"
        app:layout_constraintTop_toTopOf="parent" />
</androidx.constraintlayout.widget.ConstraintLayout>
- Inside the MainActivity file, Specify the MainActivity view as the lifecycle owner of the binding and pass the displayDataViewModel into the data binding.
binding.lifecycleOwner = this
binding.displayDataViewModel = viewModel
Step 4: Implement the DataProperty
- Create the DataProperty and add the following code
data class DataProperty(
        val userId: Int,
        val id: String,
        val title: String,
        val completed: Boolean
)
Each of the variables in the MarsProperty class corresponds to a key name in the JSON object.
Step 5: Implement the DisplayDataApiService
- Create DisplayDataApiService.kt and add a constant Base Url at the top of the file. We will use a fake Online REST API.
private const val BASE_URL = "https://jsonplaceholder.typicode.com/" - Below the constant, add the following code to create the Moshi instance.
private val moshi = Moshi.Builder() .add(KotlinJsonAdapterFactory()) .build() - Below the Moshi instance, use a Retrofit builder to create a Retrofit object.
private val retrofit = Retrofit.Builder()
   .addConverterFactory(MoshiConverterFactory.create(moshi))
   .baseUrl(BASE_URL)
   .build()
- Just below the call to the Retrofit builder, define an interface that defines how Retrofit talks to the web server using HTTP requests.
interface DisplayDataApiService {
    @GET("todos")
    suspend fun getProperties():
            List<DataProperty>
}
- Below the DisplayDataApiService interface, define a public object called DataApi to initialize the Retrofit service.
object DataApi {
    val retrofitService : DisplayDataApiService by lazy {
       retrofit.create(DisplayDataApiService::class.java) }
}
Step 6: Call the web service in DisplayDataViewModel.
- In the DisplayDataViewModel, we create the init block and call getDetails() method inside.
init {
    getDetails()
}
- Create the getDetails method
private fun getDetails() {

}
- Inside getDetails(), launch the coroutine using viewModelScope.
viewModelScope.launch {

}
- Inside the launch block, add a try/catch block to handle exceptions:
try {

} catch (e: Exception) {

}
- Inside the try {} block, call getProperties() on the retrofitService object:
val listResult = DataApi.retrofitService.getProperties()
- Calling getProperties() from the DataApi service creates and starts the network call on a background thread.
Also inside the try {} block, update the response message for the successful response:
_response.value =
   "Success: ${listResult.size} details retrieved"
- Inside the catch {} block, handle the failure response:
_response.value = "Failure: ${e.message}"
Step 7: Define the internet permission.
Step 7: Define the internet permission.
<uses-permission android:name="android.permission.INTERNET" />
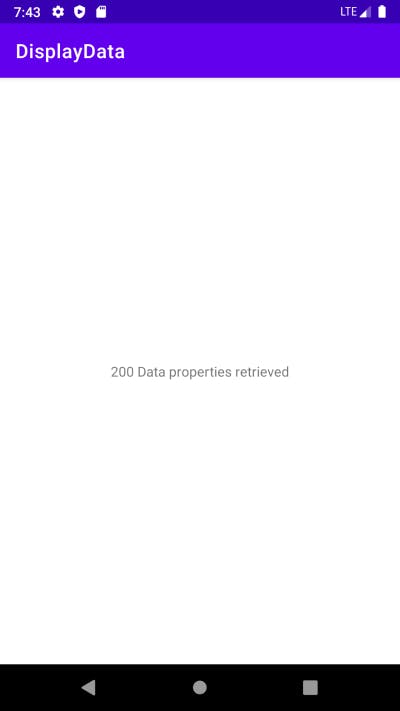
- Compile and run the app. If everything is working correctly with your internet connection, you see...
Cover photo by Shahadat Rahman on Unsplash