
Using Retrofit to load and display a grid of images with RecyclerView - Part 1


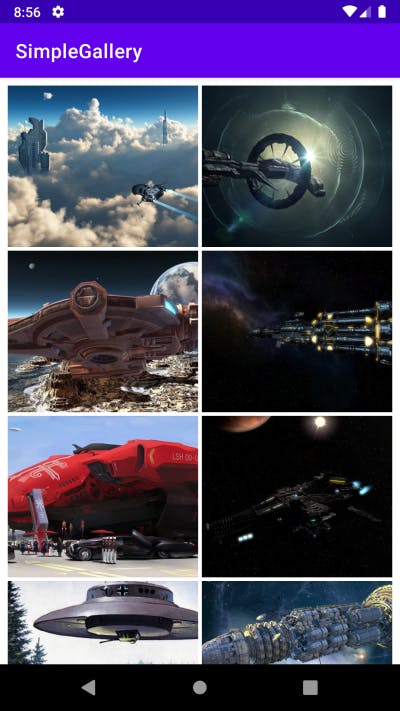
In this tutorial, we will create an app called SimpleGallery which displays a grid of spaceships images from a web URL. This app connects to a web service to retrieve and display the property data. We will use a RecyclerView with a GridLayoutManager to get this done. A list grid of space ships pictures is displayed. When we click on a picture, details of the space ship is displayed.
 Let's get started...
Create a New Project and call it SimpleGallery
- Open Android Studio if it is not already opened.
- In the main Welcome to Android Studio dialog, click Start a new Android Studio project.
- The Choose your project dialog appears. Select Empty Activity as shown below, and click Next.
- In the Configure your project dialog, enter "SimpleGallery" for the Name, set Minimum SDK to API 21 and click Finish

Add various dependencies
After it’s done building, open your app-level build.gradle and add the various dependencies:
- Ensure you add the data binding dependency to Gradle, apply the kotlin-kapt plugin at the top of the build.gradle file and the support for Java 8 language features are added
plugins {
    id 'com.android.application'
    id 'kotlin-android'
    id 'kotlin-kapt'
    id 'kotlin-parcelize'
    id 'androidx.navigation.safeargs'
}

android {
    compileSdkVersion 30
    buildToolsVersion "30.0.2"

    defaultConfig {
        applicationId "com.example.simplegalleryapp"
        minSdkVersion 21
        targetSdkVersion 30
        versionCode 1
        versionName "1.0"

        testInstrumentationRunner "androidx.test.runner.AndroidJUnitRunner"
    }

    buildTypes {
        release {
            minifyEnabled false
            proguardFiles getDefaultProguardFile('proguard-android-optimize.txt'), 'proguard-rules.pro'
        }
    }
    compileOptions {
        sourceCompatibility JavaVersion.VERSION_1_8
        targetCompatibility JavaVersion.VERSION_1_8
    }
    kotlinOptions {
        jvmTarget = '1.8'
    }
    buildFeatures {
        dataBinding true
    }
}

dependencies {

    implementation "org.jetbrains.kotlin:kotlin-stdlib:$kotlin_version"
    implementation 'androidx.core:core-ktx:1.3.2'
    implementation 'androidx.appcompat:appcompat:1.2.0'
    implementation 'com.google.android.material:material:1.2.1'
    implementation 'androidx.constraintlayout:constraintlayout:2.0.4'
    implementation 'androidx.legacy:legacy-support-v4:1.0.0'
    implementation 'androidx.navigation:navigation-fragment-ktx:2.2.2'
    implementation 'androidx.navigation:navigation-ui-ktx:2.2.2'
    testImplementation 'junit:junit:4.+'
    androidTestImplementation 'androidx.test.ext:junit:1.1.2'
    androidTestImplementation 'androidx.test.espresso:espresso-core:3.3.0'

    //Retrofit
    implementation "com.squareup.retrofit2:retrofit:2.9.0"
    implementation "com.squareup.retrofit2:converter-moshi:2.9.0"

    //Moshi Library
    implementation "com.squareup.moshi:moshi-kotlin:1.9.3"

    //Glide Library
    implementation "com.github.bumptech.glide:glide:4.8.0"

    //ViewModel
    implementation "androidx.lifecycle:lifecycle-viewmodel-ktx:2.2.0"

    //RecyclerView
    implementation "androidx.recyclerview:recyclerview:1.1.0"

    // Navigation
    implementation "androidx.navigation:navigation-fragment-ktx:2.3.2"
    implementation "androidx.navigation:navigation-ui-ktx:2.3.2"
}
To add Safe Args to your project, Include the following classpath in your top-level build.gradle(Project) file:
dependencies {...

      classpath "androidx.navigation:navigation-safe-args-gradle-plugin:2.3.2"
  }
Click on Sync Now at the top right corner.
Project Resources
- Open your strings.xml and add these strings.
<resources>
    <string name="app_name">SimpleGallery</string>
    <string name="name">%s</string>
    <string name="destination">Destination: %s</string>
</resources>
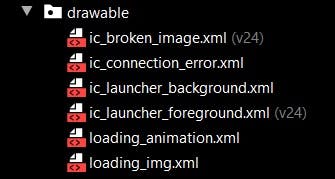
- Get/download resources for broken_image, connection_error, loading_img, and loading_animation.
Your drawable package should look like this:
- Create BindingAdapters.kt file and add the following:
Import all various dependencies in bindImage function and ignore all demands to import any dependency in the bindStatus function.
/**
 * Uses the Glide library to load an image by URL into an [ImageView]
 */
@BindingAdapter("imageUrl")
fun bindImage(imgView: ImageView, imgUrl: String?) {
    imgUrl?.let {
        val imgUri =
            imgUrl.toUri().buildUpon().scheme("https").build()
        Glide.with(imgView.context)
            .load(imgUri)
            .apply(
                RequestOptions()
                    .placeholder(R.drawable.loading_animation)
                    .error(R.drawable.ic_broken_image)
            )
            .into(imgView)
    }
}

/**
 * This binding adapter displays the GalleryApiStatus of the network request in an image view.  When
 * the request is loading, it displays a loading_animation.  If the request has an error, it
 * displays a broken image to reflect the connection error.  When the request is finished, it
 * hides the image view.
 */
@BindingAdapter("galleryApiStatus")
fun bindStatus(
    statusImageView: ImageView,
    status: GalleryApiStatus?
) {
    when (status) {
        GalleryApiStatus.LOADING -> {
            statusImageView.visibility = View.VISIBLE
            statusImageView.setImageResource(R.drawable.loading_animation)
        }
        GalleryApiStatus.ERROR -> {
            statusImageView.visibility = View.VISIBLE
            statusImageView.setImageResource(R.drawable.ic_connection_error)
        }
        GalleryApiStatus.DONE -> {
            statusImageView.visibility = View.GONE
        }
    }
}
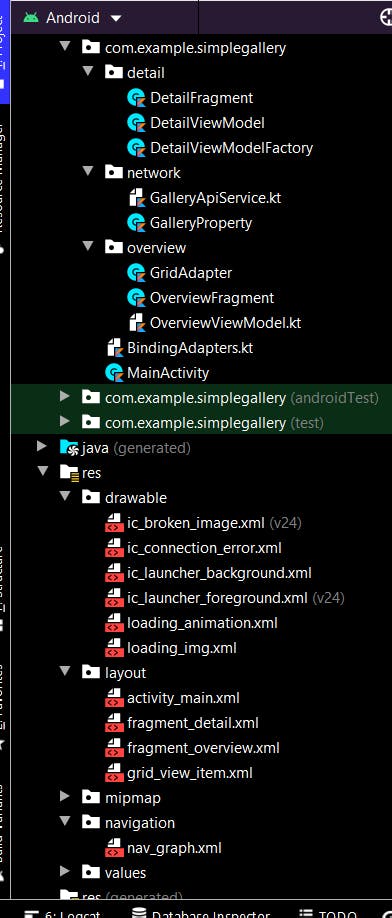
- Kotlin source files:
Fetch Data from API Using Retrofit
- Define the internet permission in the AndroidManifest.xml
<uses-permission android:name="android.permission.INTERNET" />
Implement GalleryProperty data class
- Create a package in the com.example.simplegallery and call it network.
- Inside the network package create a data class, call it GalleryProperty and add the following code.
data class GalleryProperty(
val id: String,
val name: String,
val propellant: String,
val destination: String,
@Json(name = "imageurl") val imgSrcUrl: String,
val technologyexists: String)
Each of the variables in the GalleryProperty data class corresponds to a key name in the JSON object.
Implement the GalleryApiService.
- Inside the network package, create GalleryApiService.kt file and add a constant Base Url at the top of the file. We will use a fake Online REST API.
- Below the constant, add the code to create the Moshi instance.
- Below the Moshi instance, use a Retrofit builder to create a Retrofit object.
- Just below the call to the Retrofit builder, define an interface that defines how Retrofit talks to the web server using HTTP requests.
- Below the GalleryApiService interface, define a public object called GalleryApi to initialize the Retrofit service.
- Import all necessary dependencies.
private const val BASE_URL = "https://raw.githubusercontent.com/"

private val moshi = Moshi.Builder()
    .add(KotlinJsonAdapterFactory())
    .build()

private val retrofit = Retrofit.Builder()
    .addConverterFactory(MoshiConverterFactory.create(moshi))
    .baseUrl(BASE_URL)
    .build()

interface GalleryApiService {
    @GET("Oclemy/SampleJSON/338d9585/spacecrafts.json")
    suspend fun getProperties():
            List<GalleryProperty>
}

object GalleryApi {
    val retrofitService : GalleryApiService by lazy {
        retrofit.create(GalleryApiService::class.java) }
}
Loading the Images
Now that we can finally get data gallery from API, it’s time to show these galleries to your UI.
Create the nav_graph.xml for Navigation
- In the Project window, right-click on the res directory and select New > Android Resource File. The New Resource File dialog appears.
- Type "nav_graph" as the name in the File name field.
- Select Navigation from the Resource type drop-down list, and then click OK.
- Select the Code tab to view the layout XML code and add the code below:
<?xml version="1.0" encoding="utf-8"?>
<navigation xmlns:android="http://schemas.android.com/apk/res/android"
    xmlns:app="http://schemas.android.com/apk/res-auto"
    xmlns:tools="http://schemas.android.com/tools"
    android:id="@+id/nav_graph"
    app:startDestination="@id/overviewFragment">

    <fragment
        android:id="@+id/overviewFragment"
        android:name="com.example.simplegallery.overview.OverviewFragment"
        android:label="fragment_overview"
        tools:layout="@layout/fragment_overview" >

    </fragment>
</navigation>
Ignore the OverviewFragment errors for now. We'll create it soon.
Create and setup OverviewViewModel.
- Create a package in the com.example.simplegallery and call it overview.
- Inside the overview package create a file, call it OverviewViewModel and add the following code.
- Import all necessary dependencies and ignore the dependencies that are not yet ready.
enum class GalleryApiStatus { LOADING, ERROR, DONE }

class OverviewViewModel : ViewModel() {

        //MutableLiveData that stores the status of the most recent request
    private val _status = MutableLiveData<GalleryApiStatus>()
    val status: LiveData<GalleryApiStatus>
        get() = _status

        //MutableLiveData for properties
    private val _properties = MutableLiveData<List<GalleryProperty>>()
    val properties: LiveData<List<GalleryProperty>>
        get() = _properties

        /**
     * Call getGalleryProperties() on init so we can display status immediately.
     */
    init {
        getGalleryProperties()
    }

        /**
     * Gets filtered Gallery property information from the API Retrofit service and
     * updates the [DataProperty] [List] and [GalleryApiStatus] [LiveData].
     */
    private fun getGalleryProperties() {
        viewModelScope.launch {
            _status.value = GalleryApiStatus.LOADING
            try {
                _properties.value = GalleryApi.retrofitService.getProperties()
                _status.value = GalleryApiStatus.DONE
            } catch (e: Exception) {
                _status.value = GalleryApiStatus.ERROR
                _properties.value = ArrayList()
            }
        }
    }
}
Go back to BindingAdapters.kt file and import the remaining dependencies in the bindStatus function.
Open your activity_main.xml and add the OverviewFragment to the main layout file
- Open res > layout > activity_main.xml and select the Code tab to view the layout XML code.
- Delete the codes Inside the existing main layout file.
- Add the following code:
<?xml version="1.0" encoding="utf-8"?>
<fragment xmlns:android="http://schemas.android.com/apk/res/android"
    xmlns:app="http://schemas.android.com/apk/res-auto"
    android:id="@+id/nav_host_fragment"
    android:name="androidx.navigation.fragment.NavHostFragment"
    android:layout_width="match_parent"
    android:layout_height="match_parent"
    app:defaultNavHost="true"
    app:navGraph="@navigation/nav_graph" />
Add a Fragment class called OverviewFragment create a binding object.
- Right click on the overview package and select New > Fragment > Fragment (Blank).
- For the Fragment Name, enter OverviewFragment.
- For the Fragment layout name, enter fragment_overview
- For source language, select Kotlin and click Finish.
- Open the OverviewFragment.kt fragment file, if it is not already open.
- Delete the onCreate() method, the fragment initialization parameters, and the companion object.
- At the top of OverviewFragment class, make the OverviewFragment lazily initializes the OverviewViewModel.
- Next, create a binding object and inflate the Fragment's view (which is equivalent to using setContentView() for an Activity. Ignore the error from FragmentOverviewBinding for now. Just make sure your OverviewFragment class looks like the following:
class OverviewFragment : Fragment() {
    private val viewModel: OverviewViewModel by lazy {
        ViewModelProvider(this).get(OverviewViewModel::class.java)
    }

    override fun onCreateView(
        inflater: LayoutInflater, container: ViewGroup?,
        savedInstanceState: Bundle?
    ): View? {
        val binding = FragmentOverviewBinding.inflate(inflater)
        binding.lifecycleOwner = this
        binding.viewModel = viewModel
                binding.photosGrid.adapter = GridAdapter()

        return binding.root
    }
}
Update the fragment_overview.xml and add a RecyclerView for Gallery Display.
<?xml version="1.0" encoding="utf-8"?>
<layout xmlns:android="http://schemas.android.com/apk/res/android"
    xmlns:app="http://schemas.android.com/apk/res-auto"
    xmlns:tools="http://schemas.android.com/tools">

    <data>

        <variable
            name="viewModel"
            type="com.example.simplegallery.overview.OverviewViewModel" />
    </data>

    <androidx.constraintlayout.widget.ConstraintLayout
        android:layout_width="match_parent"
        android:layout_height="match_parent"
        tools:context="com.example.simplegallery.MainActivity">

    <androidx.recyclerview.widget.RecyclerView
        android:id="@+id/photos_grid"
        android:layout_width="0dp"
        android:layout_height="0dp"
        android:clipToPadding="false"
        android:padding="6dp"
        app:layoutManager="androidx.recyclerview.widget.GridLayoutManager"
        app:layout_constraintBottom_toBottomOf="parent"
        app:layout_constraintLeft_toLeftOf="parent"
        app:layout_constraintRight_toRightOf="parent"
        app:layout_constraintTop_toTopOf="parent"
        app:listData="@{viewModel.properties}"
        app:spanCount="2"
        tools:itemCount="16"
        tools:listitem="@layout/grid_view_item" />
    </androidx.constraintlayout.widget.ConstraintLayout>
</layout>
- Under res->layout folder, create a new Layout Resource File called grid_view_item.xml.
<?xml version="1.0" encoding="utf-8"?>
<layout xmlns:android="http://schemas.android.com/apk/res/android"
    xmlns:app="http://schemas.android.com/apk/res-auto"
    xmlns:tools="http://schemas.android.com/tools">

    <data>
        <variable
            name="property"
            type="com.example.simplegallery.network.GalleryProperty" />
    </data>

    <FrameLayout
        android:layout_width="match_parent"
        android:layout_height="170dp">

        <ImageView
            android:id="@+id/data_image"
            android:layout_width="match_parent"
            android:layout_height="170dp"
            android:adjustViewBounds="true"
            android:padding="2dp"
            android:scaleType="centerCrop"
            app:imageUrl="@{property.imgSrcUrl}"
            tools:src="@tools:sample/backgrounds/scenic" />

    </FrameLayout>
</layout>
Go back to OverviewFragment and import the FragmentOverviewBinding. We'll fix the GridAdapter() error next.
Create a new class called GridAdapter.
Inside the overview package create a class, call it GridAdapter and add the following code.
Add all necessary imports. Make sure to import androidx.recyclerview.widget.ListAdapter for ListAdapter.
import androidx.recyclerview.widget.ListAdapter
class GridAdapter() :
    ListAdapter<GalleryProperty, GridAdapter.GalleryPropertyViewHolder>(DiffCallback) {
    class GalleryPropertyViewHolder(private var binding: GridViewItemBinding) :
        RecyclerView.ViewHolder(binding.root) {
        fun bind(galleryProperty: GalleryProperty) {
            binding.property = galleryProperty
            binding.executePendingBindings()
        }
    }

    companion object DiffCallback : DiffUtil.ItemCallback<GalleryProperty>() {
        override fun areItemsTheSame(oldItem: GalleryProperty, newItem: GalleryProperty): Boolean {
            return oldItem === newItem
        }

        override fun areContentsTheSame(
            oldItem: GalleryProperty,
            newItem: GalleryProperty
        ): Boolean {
            return oldItem.id == newItem.id
        }
    }

    override fun onCreateViewHolder(
        parent: ViewGroup,
        viewType: Int
    ): GalleryPropertyViewHolder {
        return GalleryPropertyViewHolder(GridViewItemBinding.inflate(LayoutInflater.from(parent.context)))
    }

    override fun onBindViewHolder(holder: GalleryPropertyViewHolder, position: Int) {
        val galleryProperty = getItem(position)
        holder.bind(galleryProperty)
    }
}
Go to BindingAdapters.kt and add the following code:
/**
 * When there is no Gallery data (data is null), hide the [RecyclerView], otherwise show it.
 */
@BindingAdapter("listData")
fun bindRecyclerView(recyclerView: RecyclerView, data: List<GalleryProperty>?) {
    val adapter = recyclerView.adapter as GridAdapter
    adapter.submitList(data)
}
Run the app. Scroll through the list to view the gallery of Space ships.
Link to Using Retrofit to load and display a grid of images with RecyclerView - Part 2
Cover photo by Pierre Châtel-Innocenti on Unsplash