Using Retrofit to load and display a grid of images with RecyclerView - Part 2
Display Gallery details
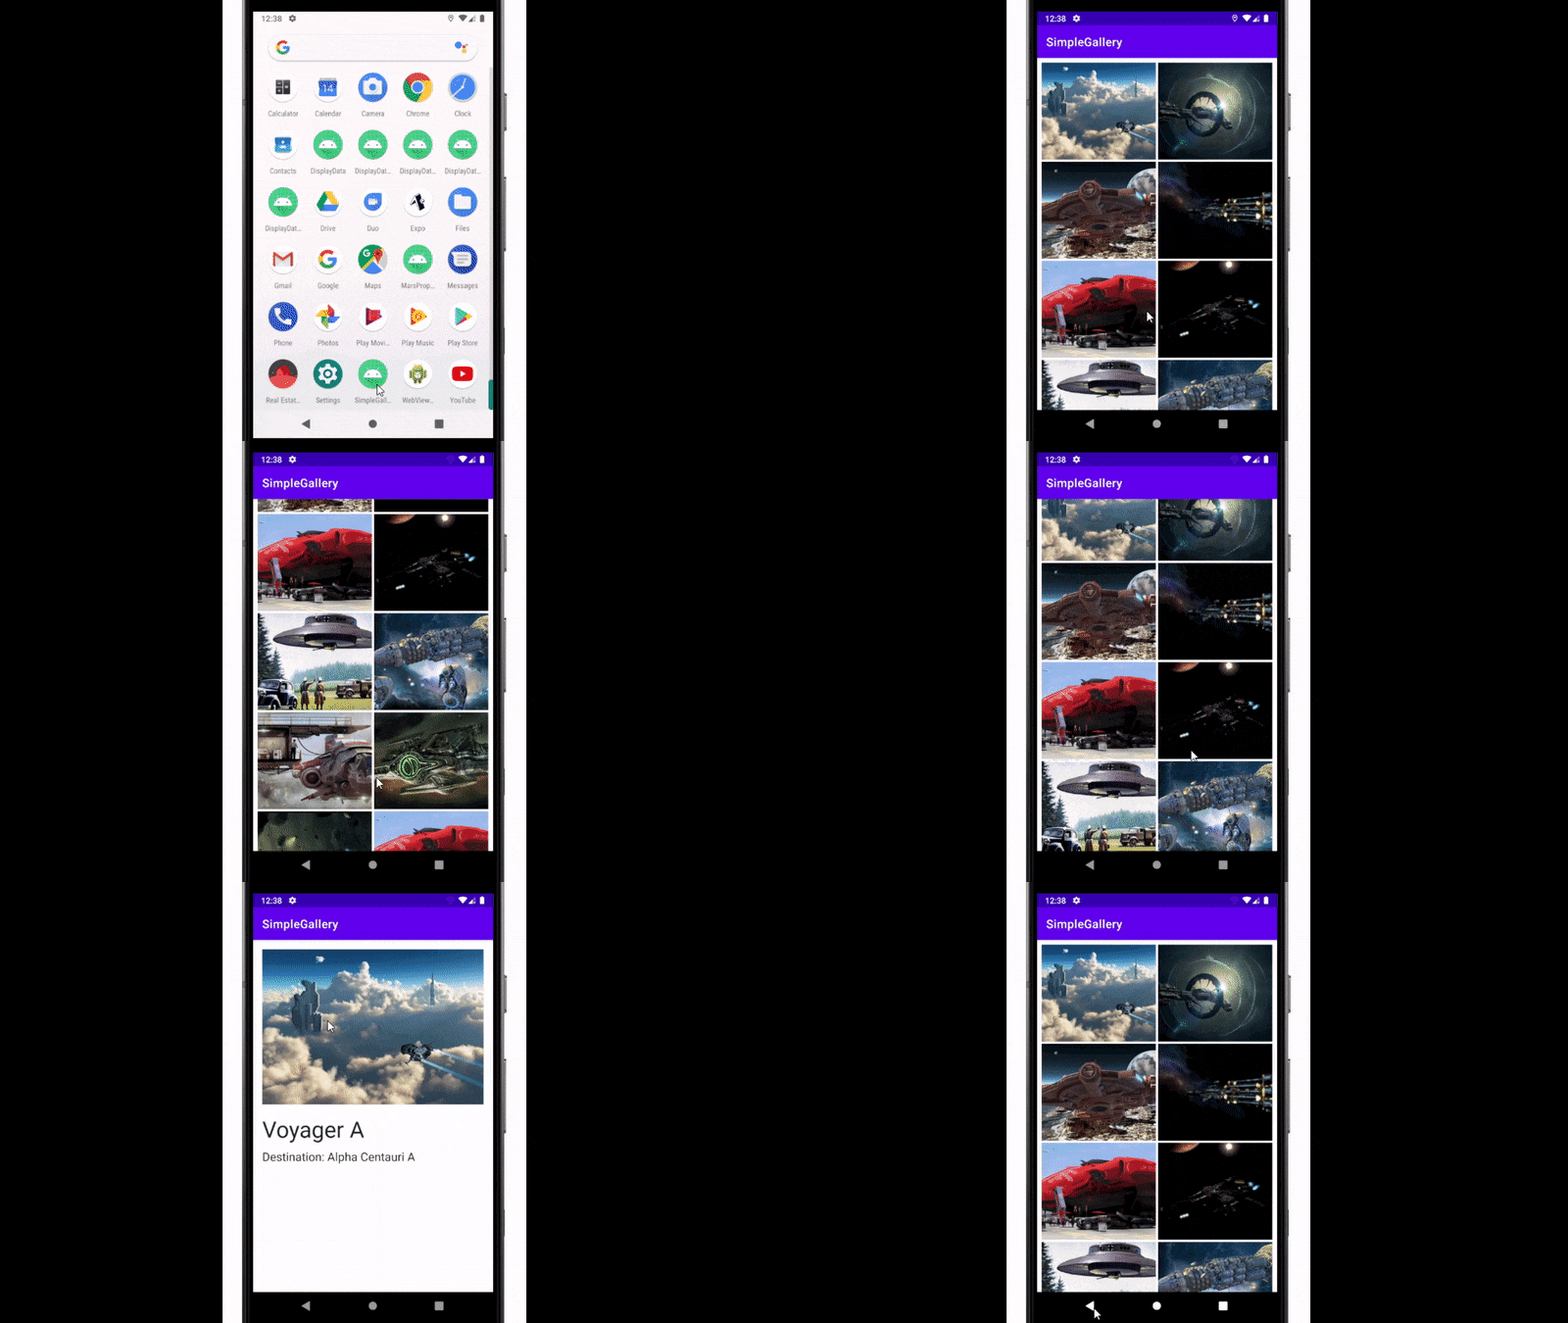
In part 1, we created an app called SimpleGallery which displays a grid of spaceships images from a web URL.
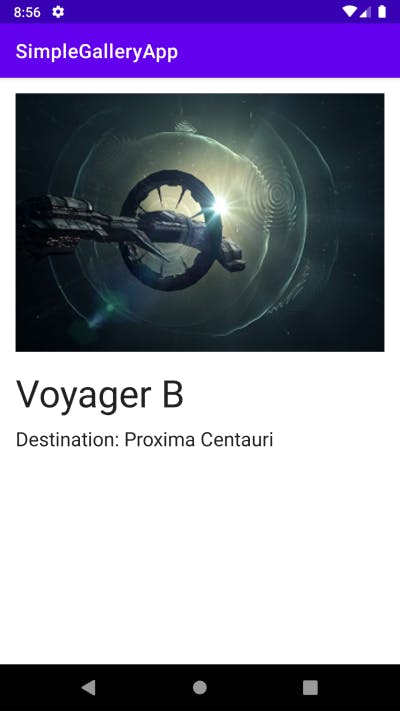
In this task, you add a detail fragment to display the details of a specific property. The detail fragment will show a larger image, the name of the spaceship, and the destination of the spaceship.

This fragment is launched when the user taps an image in the overview grid. To accomplish this, you need to add an onClick listener to the RecyclerView grid items, and then navigate to the new fragment.
- Create DetailViewModel
- Create a package in the com.example.simplegallery and call it detail.
- Inside the detail package create a file, call it DetailViewModel and add the following code.
- Import all necessary dependencies and ignore the dependencies that are not yet ready
class DetailViewModel(galleryProperty: GalleryProperty,
                      app: Application) : AndroidViewModel(app) {
    private val _selectedProperty = MutableLiveData<GalleryProperty>()
    val selectedProperty: LiveData<GalleryProperty>
        get() = _selectedProperty

    init {
        _selectedProperty.value = galleryProperty
    }

    val displayDestination = Transformations.map(selectedProperty) {
        app.applicationContext.getString(
            R.string.destination,
            it.destination
        )
    }

    val displayName = Transformations.map(selectedProperty) {
        app.applicationContext.getString(
            R.string.name,
            it.name
        )
    }
}
Create a DetailViewModelFactory.
- Inside the detail package create a file, call it DetailViewModelFactory and add the following code.
- Import all necessary dependencies and ignore the dependencies that are not yet ready
class DetailViewModelFactory(
    private val galleryProperty: GalleryProperty,
    private val application: Application
) : ViewModelProvider.Factory {
    @Suppress("unchecked_cast")
    override fun <T : ViewModel?> create(modelClass: Class<T>): T {
        if (modelClass.isAssignableFrom(DetailViewModel::class.java)) {
            return DetailViewModel(galleryProperty, application) as T
        }
        throw IllegalArgumentException("Unknown ViewModel class")
    }
}
Create the DetailFragment
- Right click details package, select New > Fragment > Fragment (Blank).
- For the Fragment Name, enter DetailFragment.
- For the Fragment layout name, enter fragment_detail
- For source language, select Kotlin and click Finish.
- Open fragment_detail.xml and let’s build our UI.
<?xml version="1.0" encoding="utf-8"?>
<layout xmlns:android="http://schemas.android.com/apk/res/android"
    xmlns:tools="http://schemas.android.com/tools"
    xmlns:app="http://schemas.android.com/apk/res-auto">

    <data>
        <variable
            name="viewModel"
            type="com.example.simplegallery.detail.DetailViewModel" />
    </data>

    <ScrollView
        android:layout_width="match_parent"
        android:layout_height="match_parent"
        tools:context=".DetailFragment">

        <androidx.constraintlayout.widget.ConstraintLayout
            android:layout_width="match_parent"
            android:layout_height="wrap_content"
            android:padding="16dp">

            <ImageView
                android:id="@+id/main_photo_image"
                android:layout_width="0dp"
                android:layout_height="266dp"
                android:scaleType="centerCrop"
                app:imageUrl="@{viewModel.selectedProperty.imgSrcUrl}"
                app:layout_constraintEnd_toEndOf="parent"
                app:layout_constraintStart_toStartOf="parent"
                app:layout_constraintTop_toTopOf="parent"
                tools:src="@tools:sample/backgrounds/scenic" />

            <TextView
                android:id="@+id/property_type_text"
                android:layout_width="wrap_content"
                android:layout_height="wrap_content"
                android:layout_marginTop="16dp"
                android:textColor="#de000000"
                android:textSize="39sp"
                android:text="@{viewModel.displayName}"
                app:layout_constraintStart_toStartOf="parent"
                app:layout_constraintTop_toBottomOf="@+id/main_photo_image"
                tools:text="To Rent" />

            <TextView
                android:id="@+id/price_value_text"
                android:layout_width="wrap_content"
                android:layout_height="wrap_content"
                android:layout_marginTop="8dp"
                android:textColor="#de000000"
                android:textSize="20sp"
                android:text="@{viewModel.displayDestination}"
                app:layout_constraintStart_toStartOf="parent"
                app:layout_constraintTop_toBottomOf="@+id/property_type_text"
                tools:text="$100,000" />

        </androidx.constraintlayout.widget.ConstraintLayout>
    </ScrollView>
</layout>
Open your DetailFragment.kt and update it.
- Open the DetailFragment.kt fragment file, if it is not already open.
- Delete the onCreate() method, the fragment initialization parameters, and the companion object.
- Next, create a binding object and inflate the Fragment's view (which is equivalent to using setContentView() for an Activity. Ignore the error from FragmentDetailBinding for now. Just make sure your DetailFragment class looks like the following:
class DetailFragment : Fragment() {
    override fun onCreateView(
        inflater: LayoutInflater, container: ViewGroup?,
        savedInstanceState: Bundle?
    ): View? {
        val application = requireNotNull(activity).application
        val binding = FragmentDetailBinding.inflate(inflater)
        binding.lifecycleOwner = this

        return binding.root
    }
}
Set up the click listeners in the grid adapter and fragment
- Open GridAdapter.kt. At the end of the class, create a custom OnClickListener class that takes a lambda with a galleryProperty parameter. Inside the class, define an onClick() function that is set to the lambda parameter.
class OnClickListener(val clickListener: (galleryProperty:GalleryProperty) -> Unit) {
        fun onClick(galleryProperty: GalleryProperty) = clickListener(galleryProperty)
    }
- Scroll up to the class definition for the PhotoGridAdapter, and add a private OnClickListener property to the constructor.
class GridAdapter( private val onClickListener: OnClickListener ) :
       ListAdapter<GalleryProperty,
           GridAdapter.GalleryPropertyViewHolder>(DiffCallback) {
- Make a photo clickable by adding the onClickListener to the grid item in the onBindviewHolder() method.
override fun onBindViewHolder(holder: GalleryPropertyViewHolder, position: Int) {
        val galleryProperty = getItem(position)
        holder.itemView.setOnClickListener {
            onClickListener.onClick(galleryProperty)
        }
        holder.bind(galleryProperty)
    }
- Open OverviewFragment.kt. In the onCreateView() method, replace the line that initializes the binding.photosGrid.adapter property with the line shown below.
binding.photosGrid.adapter = GridAdapter(GridAdapter.OnClickListener {
            viewModel.displayPropertyDetails(it)
        })
Ignore the displayPropertyDetails error for now
- Modify the navigation graph and make GalleryProperty parcelable. We'll use Safe Args from the navigation component to a GalleryProperty object passed to the detail fragment.
- Open nav_graph.xml. Click the Text tab to view the XML code for the navigation graph.
- Add the following code inside the nav_graph.xml
<?xml version="1.0" encoding="utf-8"?>
<navigation xmlns:android="http://schemas.android.com/apk/res/android"
    xmlns:app="http://schemas.android.com/apk/res-auto"
    xmlns:tools="http://schemas.android.com/tools"
    android:id="@+id/nav_graph"
    app:startDestination="@id/overviewFragment">

    <fragment
        android:id="@+id/overviewFragment"
        android:name="com.example.simplegallery.overview.OverviewFragment"
        android:label="fragment_overview"
        tools:layout="@layout/fragment_overview">
        <action
            android:id="@+id/action_showDetail"
            app:destination="@id/detailFragment" />
    </fragment>

    <fragment
        android:id="@+id/detailFragment"
        android:name="com.example.simplegallery.detail.DetailFragment"
        android:label="fragment_detail"
        tools:layout="@layout/fragment_detail">
        <argument
            android:name="selectedProperty"
            app:argType="com.example.simplegallery.network.GalleryProperty" />
    </fragment>
</navigation>
- Open GalleryProperty.kt. Add the @Parcelize annotation to the class definition.
- Ensure you add the following import import android.os.Parcelable and import kotlinx.parcelize.Parcelize when asked.
@Parcelize
data class GalleryProperty(
- Change the class definition of GalleryProperty to extend Parcelable.
- Ensure you import the kotlinx.parcelize.Parcelize dependency and add the "Parcelable supertype"
@Parcelize
data class GalleryProperty(
    val id: String,
    val name: String,
    val propellant: String,
    val destination: String,
    @Json(name = "imageurl") val imgSrcUrl: String,
    val technologyexists: String): Parcelable
- Next, we'll connect the fragments.
- Open OverviewFragment.kt. In onCreateView(), below the lines that initialize the photo grid adapter, add the lines shown below to observe the navigatedToSelectedProperty from the overview view model.
viewModel.navigateToSelectedProperty.observe(viewLifecycleOwner, Observer {
    if ( null != it ) {
        this.findNavController().navigate(OverviewFragmentDirections.actionShowDetail(it))
        viewModel.displayPropertyDetailsComplete()
    }
})
- In the OverviewViewModel.kt below the properties MutableLiveData add the LiveData to handle navigation to the selected property
// LiveData to handle navigation to the selected property
private val _navigateToSelectedProperty = MutableLiveData<GalleryProperty>()
val navigateToSelectedProperty: LiveData<GalleryProperty>
    get() = _navigateToSelectedProperty
- At the bottom of the OverviewViewModel.kt add the displayPropertyDetails method to help _navigateToSelectedProperty.
fun displayPropertyDetails(galleryProperty: GalleryProperty) {
    _navigateToSelectedProperty.value = galleryProperty
}
fun displayPropertyDetailsComplete() {
    _navigateToSelectedProperty.value = null
}
- Open DetailFragment.kt. Add this line just below setting the property binding.lifecycleOwner in the onCreateView() method. This line gets the selected GalleryProperty object from the Safe Args.
val galleryProperty = DetailFragmentArgs.fromBundle(requireArguments()).selectedProperty
val viewModelFactory = DetailViewModelFactory(galleryProperty, application)
binding.viewModel = ViewModelProvider(
    this, viewModelFactory).get(DetailViewModel::class.java)
- Click on Build > Rebuild Project.
Compile and run the app, tap any Spaceship Image and you should see something like this:

Cover photo by Pierre Châtel-Innocenti on Unsplash
